Usando software de terceiros com o Koha
MarcEdit
Muitas bibliotecas gostam de usar o MarcEdit para as modificações ou limpezas dos dados. Se desejar fazer este processo pode descarregar a aplicação no seguinte endereço: http://marcedit.reeset.net/
Importante
Muitas das ações descritas neste capítulo podem ser feitas no Koha usando os Modelos de modificação MARC, mas esta secção serve para quem quer usar o MarcEdit.
Adicionar um prefixo às cotas
Quanto quiser importar dados para o Koha, provavelmente quer limpar-los primeiro. Algo comum entre os utilizadores do Koha é adicionar um prefixo às cotas.
Abrir o MarcEdit
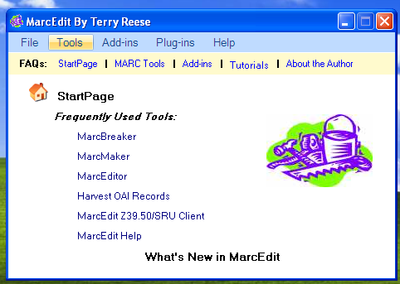
Clique em ‘MarcEditor’
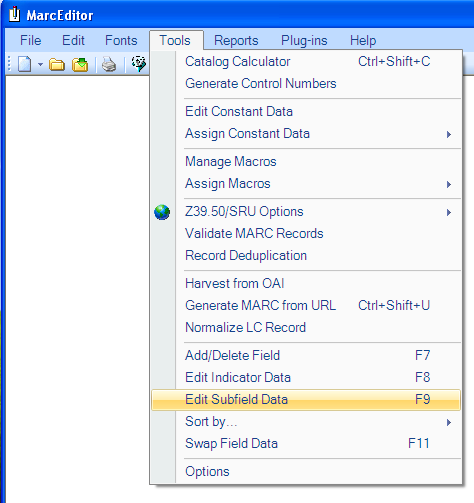
Vá a Ferramentas > Editar dados de subcampo
Para prefixar os dados o caractere especial é o: ^b Para adicionar um prefixo ao início de um subcampo, adicione ^b na caixa de texto Campo e os dados a serem adicionados na caixa Substituir
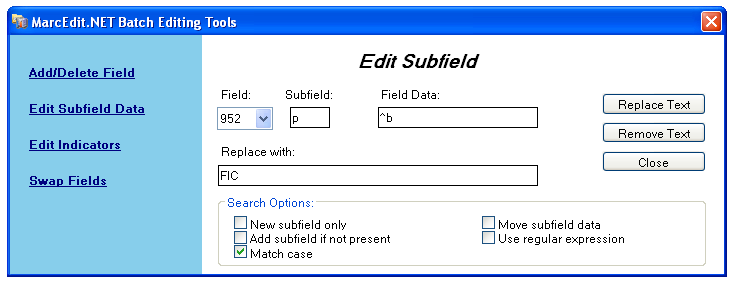
Para prefixar dados nos início de um subcampo enquanto substituiu uma frase, adicione ^b[frase a substituir] na caixa de texto Campo e os dados a serem adicionados na caixa Substituir por.
Importar dados Excel para o Koha
Suponha que tem registos da sua biblioteca em formato Excel e os deseja importar para o Koha. Como é que realiza esta operação? O Koha não permite importar esses registos diretamente. No entanto, existe uma solução simples para que consiga importar os registos. Primeiro necessitar de converter o ficheiro Excel para Marc e depois é que o consegue importar para o Koha.
Siga os passos seguintes para importar os registos em Excel para o Koha
Converter do formato Excel para o formato .mrk
Primeiro, é necessário converter do formato Excel para o formato .mrk. Para esse processo iremos usar o MarcEdit. Pode descarregar-lo no endereço http://marcedit.reeset.net/
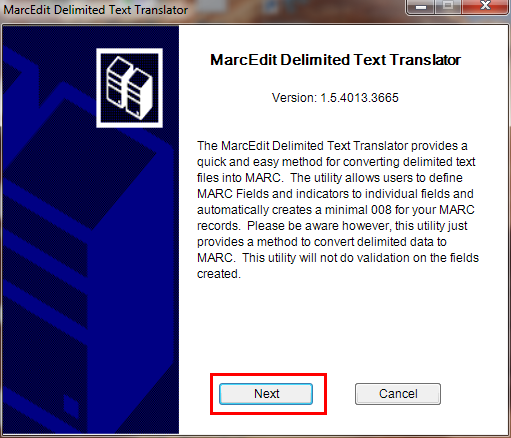
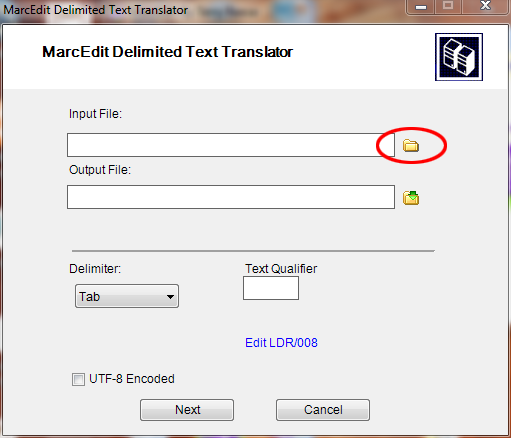
Agora abra-o e selecione Add-ins–>Delimited Text Translator.

Clique em Seguinte quando a janela seguinte aparecer.
Procure o seu ficheiro Excel.
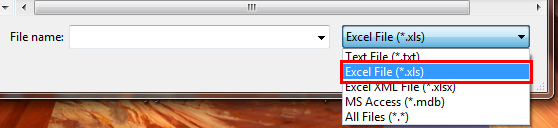
Localize o seu ficheiro Excel escolhendo o formato Ficheiro Excel (*.xls).
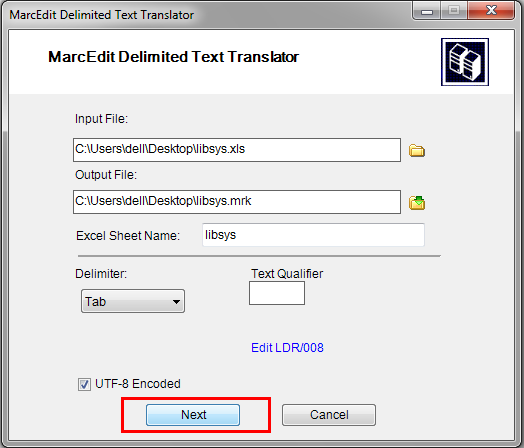
De forma similar, preencha todas as outras entradas como o Ficheiro de saída, o Nome da folha Excel e marque a codificação UTF-8 (se necessário) e clique em Seguinte.
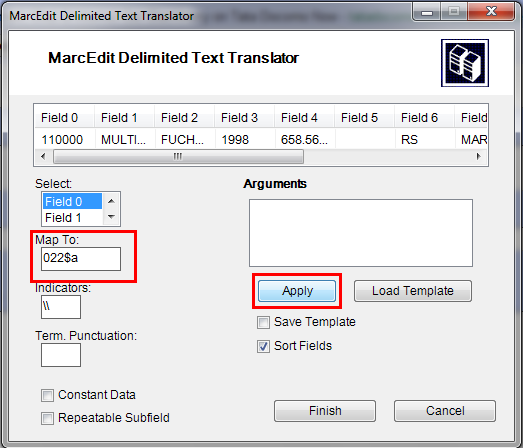
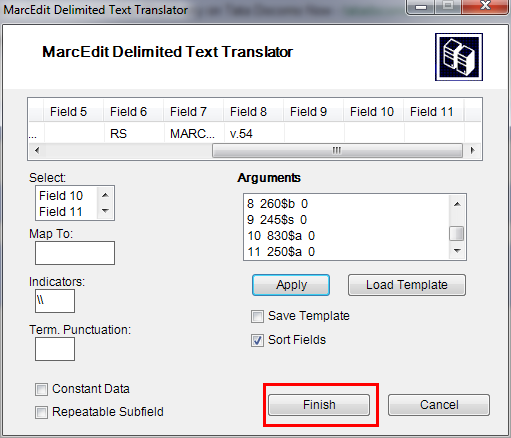
Agora será pedido para mapear os campos a reconhecer com os campos do formato MARC standard.
Suppose for Field 0 that is first column I entered Map to: 022$a( Valid ISSN for the continuing resource) and then click on Apply.
Nota
Pode personalizar os indicadores e muitas mais coisas, para mais informações sobre o formato marc21 visite o site oficial da Biblioteca do Congresso.
Da mesma forma, mapeie todos os outros campos e clique em Finalizar.
Aparecerá então uma janela a indicar que o ficheiro MARC (*.mrk) foi criado com sucesso.
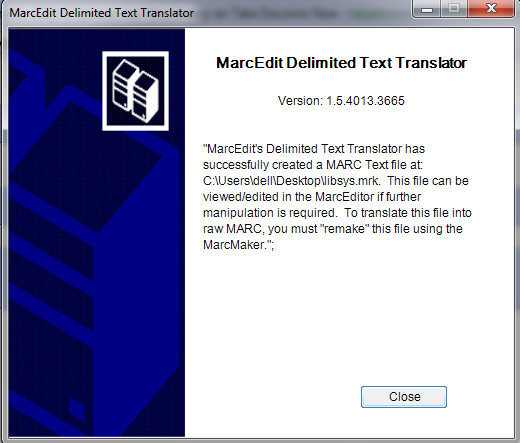
Clique em Fechar e terminou o processo de criar o ficheiro .mrk a partir do ficheiro .xls. Pode agora ver o ficheiro clicando duas vezes no mesmo.
Convert o ficheiro .mrk para .mrc
Vamos converter o ficheiro .mrk que foi criado no passo anterior para o formato MARC puro para que se possa importar diretamente para o Koha.
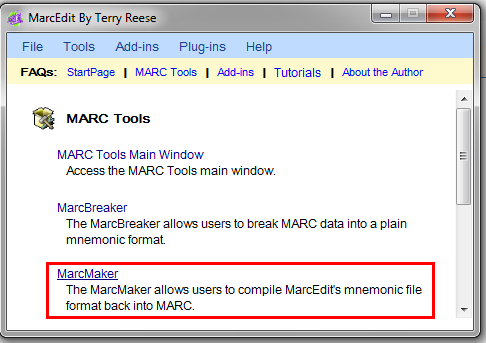
Para isso, abra novamente o MarcEdit e seleciona MARC Tools.

De seguida selecione MarcMaker para converter o ficheiro .mrk para o formato .mrc.
Localize o ficheiro de entrada e escolha um nome para o ficheiro de saída. Posteriormente clique em Execute.
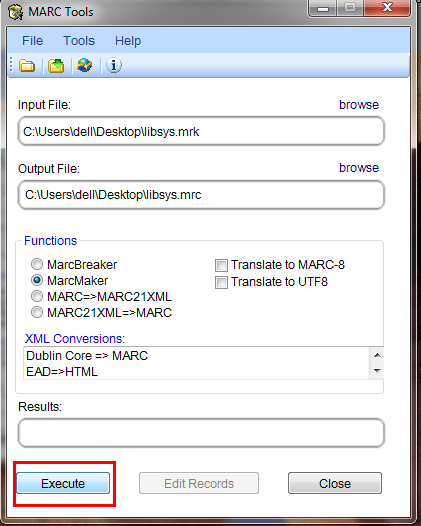
Será apresentado o resultado.
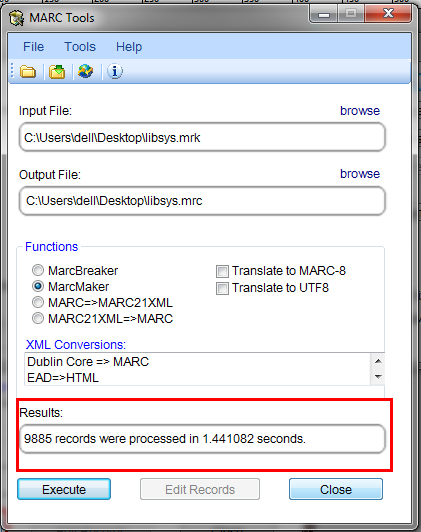
Clique em Fechar e teremos agora um ficheiro de registos MARC nativos (ficheiro .mrc).
Importar .mrc para o Koha
Pode encontrar mais informação de como importar registos para o Koha na secção ‘Importar registos MARC’ deste manual.
Por último vamos importar o ficheiro .mrc para o Koha.
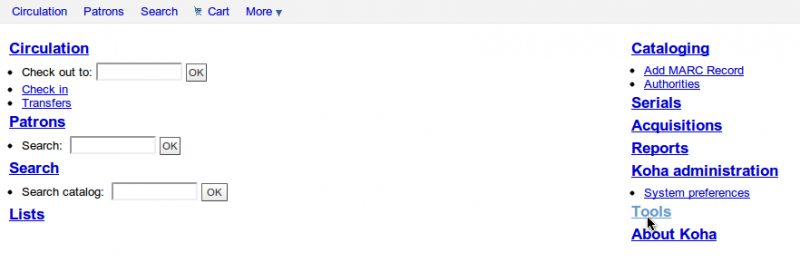
Clique nas Ferramentas no interface dos técnicos do Koha.
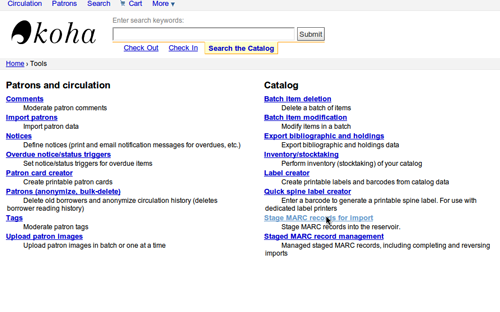
Next Click on Stage MARC Records for Import.
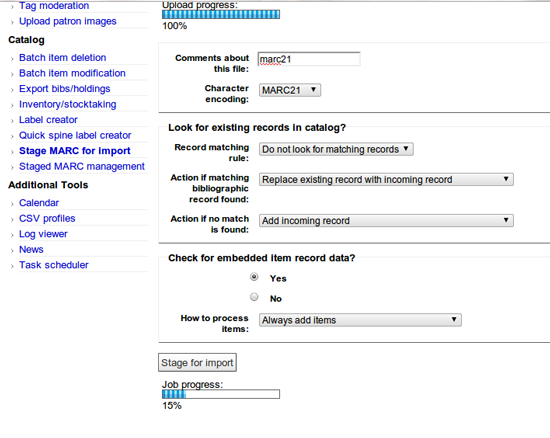
Depois, escolha o ficheiro .mrc anteriormente criado e clique em Carregar.

Pode também adicionar um comentário sobre o ficheiro e, por fim, clicar em Preparar para importar.
Quando a importação terminar, verá um resultado parecido com o seguinte
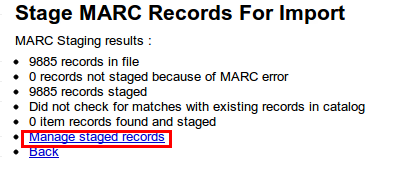
De seguida, clique em gerir os registos preparados.
Aqui pode alterar as regras de concordância a serem usadas na importação.
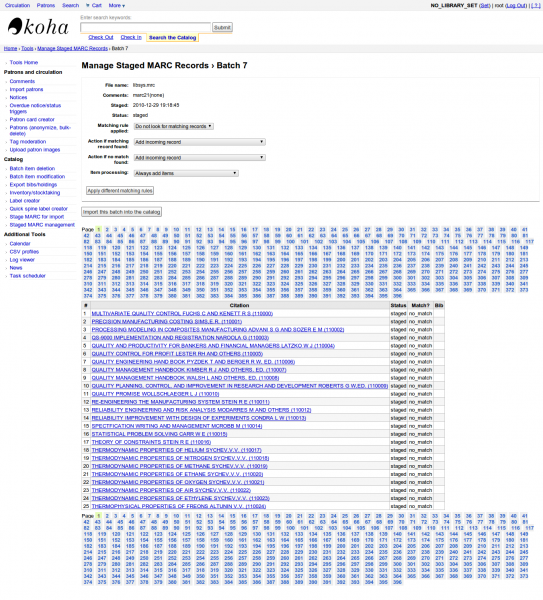
Clique em Importar este lote para o catálogo quando tiver terminado o processo.
Processo terminado. Depois de todos os registos estarem importados, pode comprovar o Estado e verificar se está como “importado”
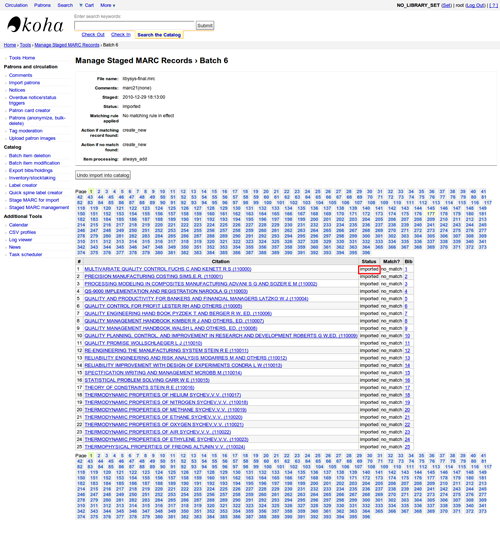
Pode também reverter a operação de importação.
Em poucos minutos, conseguimos importar cerca de 10,000 registos para o Koha com este processo.
OCLC Connexion Gateway
Koha can be set to work with the OCLC Connextion Gateway. This allows libraries to use OCLC Connexion as their cataloging tool and simply send those records to Koha with a single click. The following instructions will help you set up the OCLC Connexion Gateway, if you have a system administrator you will want to consult with them on this process.
Configurar o serviço OCLC no Koha
Primeiro, necessitar de criar um ficheiro em qualquer lado do seu sistema com a informação da configuração. Pode colocar em qualquer sítio desde que seja visível para a conta que vai executar o serviço.
O ficheiro contem 11 linhas. As primeiras 6 serão sobre o seu sistema Koha:
host: The IP address of your Koha server
port: The port you want to use for the Connexion service. This port must be different from your SIP port, or any other service
koha: The full URL of your staff client
log: The location (full file specification) of your log for the service
user: The default Koha username to use for importing
password: The password that goes with that username
As linhas seguintes descrevem como será executado:
match: The name of the matching rule from your system to use
overlay_action: "replace", "create_new", or "ignore"-- what to do if there is a match
nomatch_action: "create_new" or "ignore"-- what to do if there is no match
item_action: "always_add","add_only_for_matches","add_only_for_new", or "ignore" -- what to do with embedded 952 item data
import_mode: "direct" or "stage"
Um ficheiro de exemplo será parecido a este:
host: 1.2.3.4
port: 8000
log: /home/koha/koha-dev/var/log/connexion.log
koha: http://kohastaff.myuniversity.edu
user: koha_generic_staff
password: password
match: 001
overlay_action: replace
nomatch_action: create_new
item_action: ignore
import_mode: direct
When choosing an ‘import_mode’ if you use “direct” then the staged record will be immediately imported into Koha, and should be searchable after your indexes catch up. If you choose “stage”, then the record will be placed in a staged batch for you to later go the Manage Staged MARC Records tool to finish the import.
Se importar múltiplos registos, eles estarão no mesmo lote, até que o lote seja importado, sendo criado um novo lote posteriormente.
No modo “direto”, cada registo encontra-se no seu próprio lote.
Para iniciar o serviço, execute o script:
/location/of/connexion/import/daemon/connexion_import_daemon.pl -d -c /location/of/config/file.cnf
Configurar o cliente desktop do OCLC
Nota
As imagens são do software OCLC Connexion Client v.2.50, Koha v.3.12
Para definir a conexão do cliente OCLC para o Koha, vá a Ferramentas > Opções, e escolha o separador Exportar.
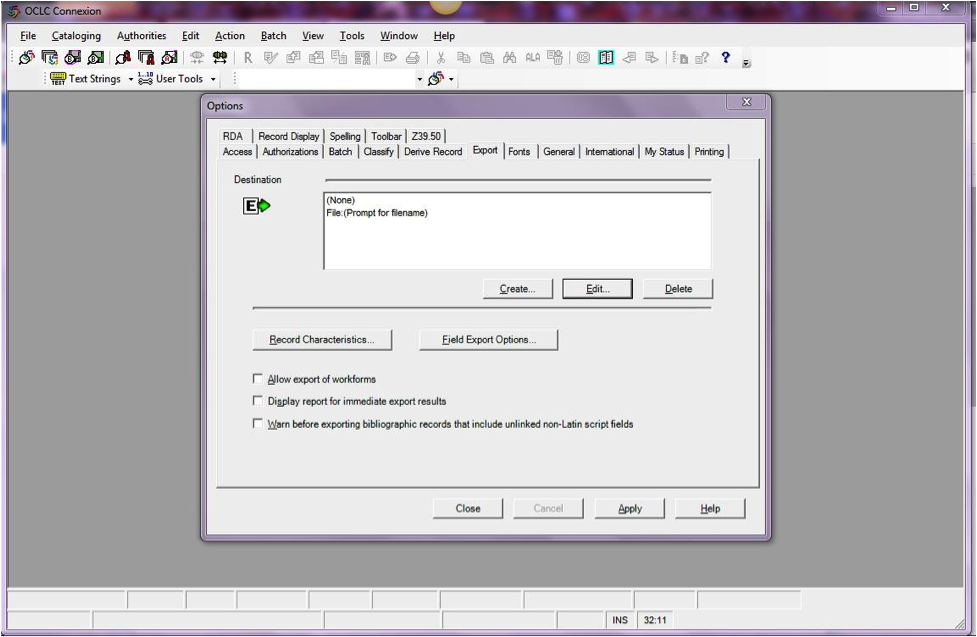
Click the “Create…” button to set up a new destination, then choose “OCLC Gateway Export” and click OK.
Enter the following information:
“Host Name:” Your catalog’s appropriate IP address (from your config file above)
“Port:” Your catalog’s appropriate port number (from your config file above)
“Login ID:” The cataloger’s Koha login
“Password:” The cataloger’s Koha password
“Notify Host Before Disconnect” = checked,
“Timeout” = 100, “Retries” = 3, “Delay” = 0 (zero),
“Send Local System Logon ID Password” = checked.
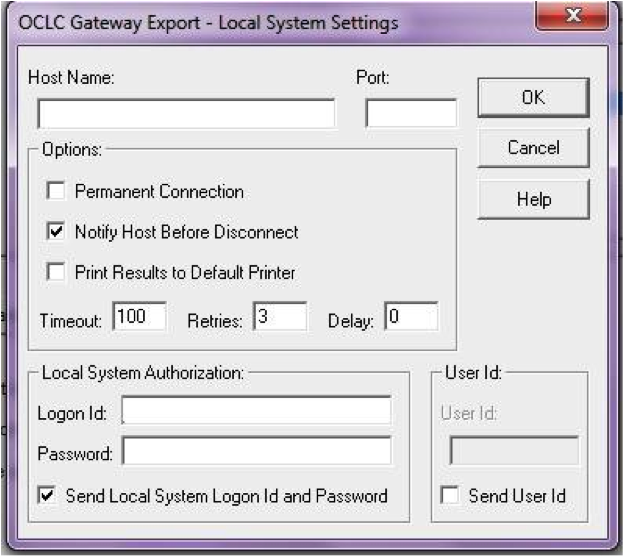
Select “OK” when finished, and you should see your new “Gateway Export” option listed (The catalog’s IP address and port are blacked out in the following screenshot)
Gateway Export Added
Click on “Record Characteristics” and make sure that the bibliographic records are using MARC21, UTF-8 Unicode, and click OK to save.
Record Characteristics
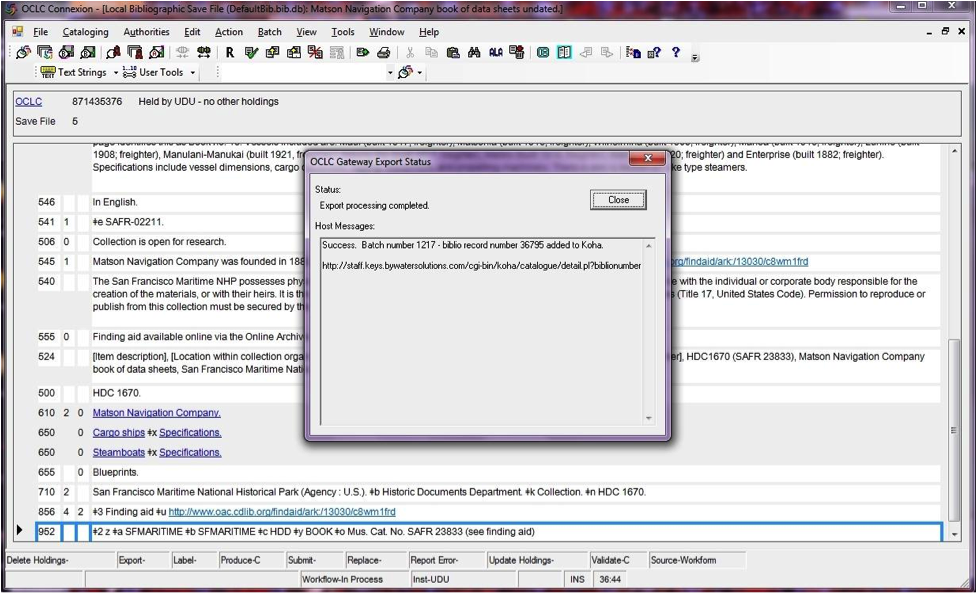
You should be ready to go! To export a record from OCLC Connexion Client to Koha, just press F5 while the record is on-screen. The export dialog will pop up, and you’ll see Connexion attempting to talk to Koha. You should get a message that the record was added or overlaid, including its biblio number, and a URL that you can copy into your web browser to jump straight to the record.
Using the OCLC Connexion Gateway
Records can be exported from Connexion either in a batch or one by one.
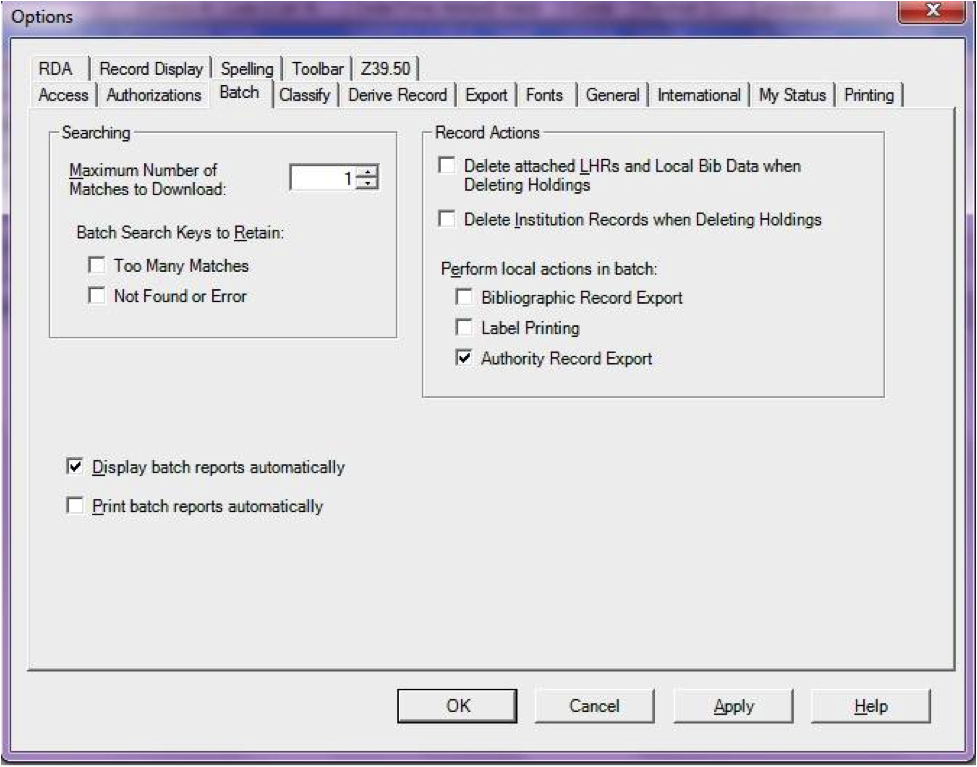
Exporting records one by one
To export bibliographic records one by one, be sure your “Batch” options are correct: from the “Tools” menu, select “Options”, and select the “Batch” tab. In the “Perform local actions in batch” area, “Bibliographic Record Export” should be unchecked
When ready to export, from the “Action” menu, select “Export” or use the F5 key. You will see a screen similar to the following if the import is successful and if the record is new to the Catalog; you may copy & paste the resulting URL into your Koha catalog to see the new record.
If the record was overlaid, you will see a message to that effect in the “OCLC Gateway Export Status” window
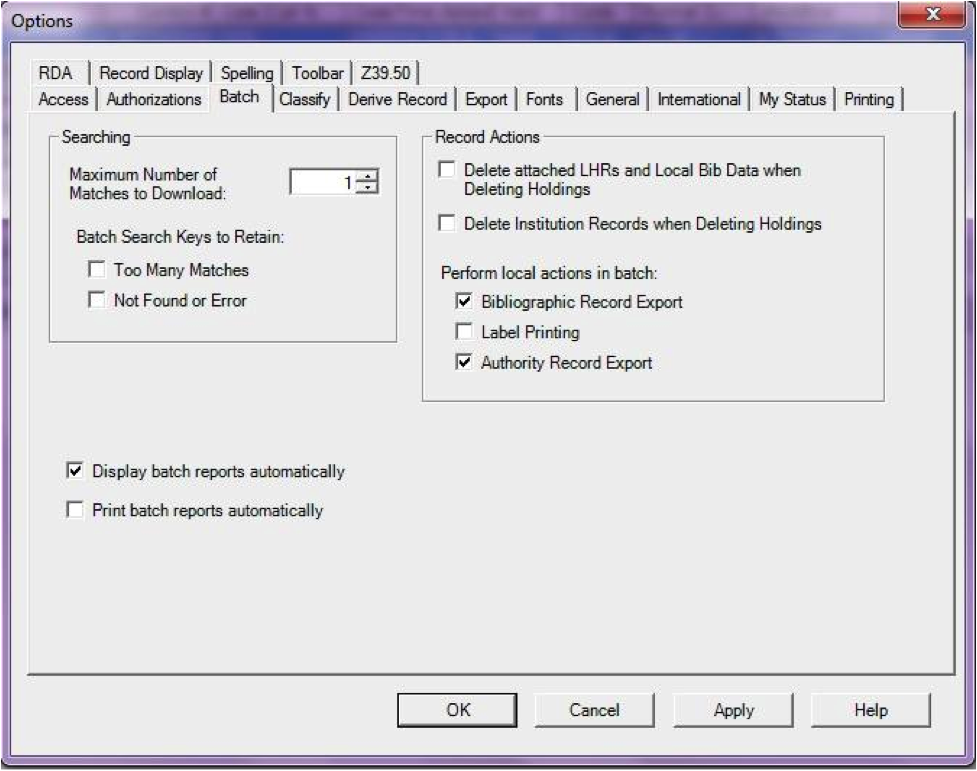
Exporting records in a batch
To export bibliographic records in a batch, be sure your “Batch” options are correct: from the “Tools” menu, select “Options”, and select the “Batch” tab. In the “Perform local actions in batch” area, “Bibliographic Record Export” should be checkedOCLC
When a record is ready to export, from the “Action” menu, select “Export” or use the F5 key, and it’s export status will be “ready.”
When ready to export the batch, from the “Batch” menu, select “Process batch” and check the appropriate “Path” and “Export” boxes
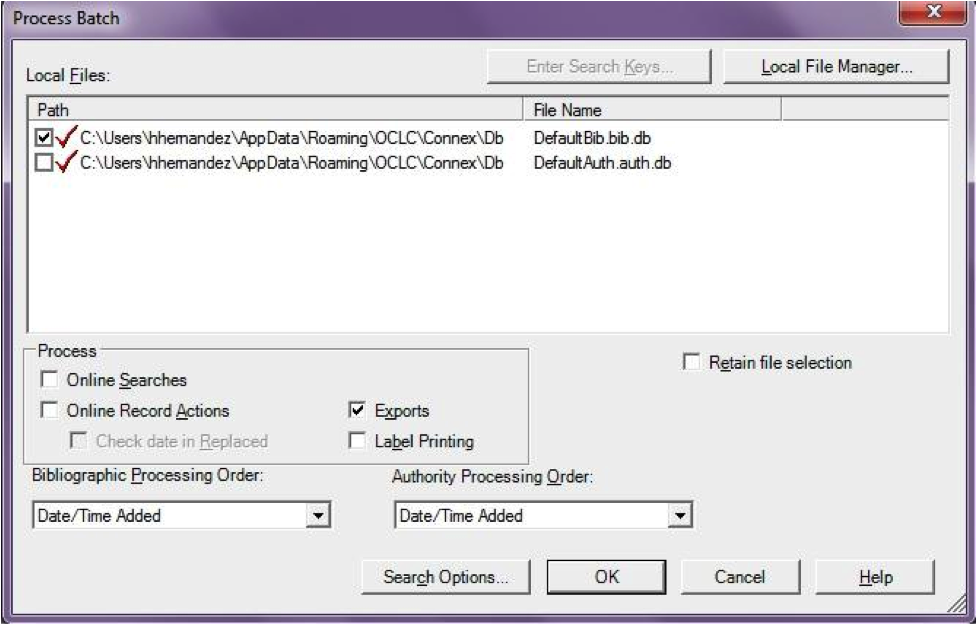
The export will begin, and the bib records will be exported & imported into Koha one by one; you will see “OCLC Gateway Export Status” windows, as above, showing you the results of each export. That window will stay there until you select “Close,” and then the next record’s export/import will begin. The process will continue until all records in the batch are completed. Then you may or may not see the Connexion Client export report (depending on your Client options for that).
Items in OCLC
If you’d like to create your item records in OCLC you can do so by addding a 952 for each item to the bib record you’re cataloging. The Item/Holdings Cataloging Guide will break down what subfields you can use in the 952, but at the minimum you want to have subfield 2, a, b, and y on your items.
952 \\$2CLASSIFICATION$aHOMEBRANCHCODE$bHOLDINGBRANCHCODE$yITEMTYPECODE
The subfield 2 holds the classification code. This can be ddc for Dewey or lcc for Library of Congress or z for Custom. Other classification sources can be found in the Classification Sources area in administration
Subfield a is your home library and needs to be the code for your home library, not the library name. You can find these codes in the Libraries administration area.
Subfield b is your holding library and needs to be the code for your holding library, not the library name. You can find these codes in the Libraries administration area.
Subfield y is your item type code. It needs to be the code, not the item type name. You can find these codes in the Item Types administration area.
952 \\$2ddc$aMAIN$bMAIN$yBOOK
In addition to these required fields you can enter any other subfield you’d like. Most libraries will enter a call number in subfield o and a barcode in subfield p as well. Review the Item/Holdings Cataloging Guide for a full list of subfields and values.
Talking Tech
Talking Tech I-tiva is a third party, proprietary, product that libraries can subscribe to. Learn more here: http://www.talkingtech.com/solutions/library.
Installation and Setup Instructions
Be sure you’ve run installer/data/mysql/atomicupdate/Bug-4246-Talking-Tech-itiva-phone-notifications.pl to install the required data pack (new syspref, notice placeholders and messaging transport preferences)
To use, TalkingTechItivaPhoneNotification syspref must be turned on.
If you wish to process PREOVERDUE or RESERVES messages, you’ll need the EnhancedMessagingPreferences system preference turned on, and patrons to have filled in a preference for receiving these notices by phone.
For OVERDUE messages, overdue notice triggers must be configured under More > Tools > Overdue notice/status triggers. Either branch-specific triggers or the default level triggers may be used (script will select whichever is appropriate).
Sending Notices File
Add the TalkingTech_itiva_outbound.pl script to your crontab
Add an FTP/SFTP or other transport method to send the output file to the I-tiva server
If you wish, archive the sent notices file in another directory after sending
Run TalkingTech_itiva_outbound.pl –help for more information
Receiving Results File
Add an FTP/SFTP or other transport method to send the Results file to a known directory on your Koha server
Add the TalkingTech_itiva_inbound.pl script to your crontab, aimed at that directory
If you wish, archive the results file in another directory after processing
Run TalkingTech_itiva_inbound.pl –help for more information